This image upload in codeigniter Example first of all I learn to Codeigniter is a light weight MVC based PHP framework. this is very useful in web development community. PHP Codeigniter is lots of the devloper used to perform different types of web projects. here File upload in PHP with codeigniter is very simply and in this article i will display codeigniter file upload example.
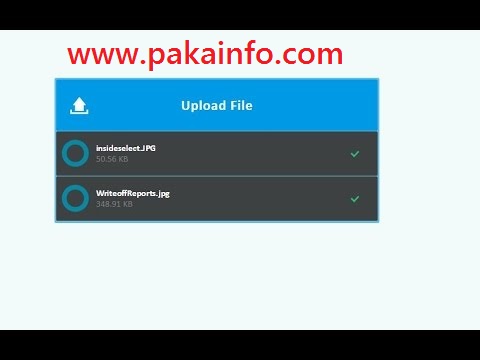
How to Upload File/image in CodeIgniter?
Our image upload in codeigniter articles are designed to create web development simple. Step-by-step instructions create our article more developer-friendly. Therefore web developers like our article rather than the official Member manual. Recently i have received many users requests for publishing the article on CodeIgniter image or file upload and fastly i have decided to publish this article.

This article will show how to upload image in CodeIgniter using image Uploading Class. here simple learn to CodeIgniter’s image Uploading PHP Class useful to multiple files or images upload files to the server side. You can use different preferences for configuring your image upload as well as restrict some type check the type and size of the files.
For your more understand I will full demo as well as the image upload with an example. Also, I will upload the Member profile_img to the server as well as insert the Member data to the MySQL database.
Step 1 : Creating Database Table (members):
Before start to writing the source code, make a sql table into your web application’s database. For this example you can make a members table into the database with some basic fields. The members table SQL would like the below.
CREATE TABLE `members` (
 `id` int(11) NOT NULL AUTO_INCREMENT,
 `name` varchar(100) COLLATE utf8_unicode_ci NOT NULL,
 `email` varchar(255) COLLATE utf8_unicode_ci NOT NULL,
 `profile_img` varchar(255) COLLATE utf8_unicode_ci NOT NULL,
 `created_at` datetime NOT NULL,
 `updated_at` datetime NOT NULL,
 `status` tinyint(1) NOT NULL DEFAULT '1' COMMENT '1=Active, 0=Inactive',
 PRIMARY KEY (`id`)
) ENGINE=InnoDB DEFAULT CHARSET=utf8 COLLATE=utf8_unicode_ci;
Step 2 : Controller (members.php):
Create a controller called members.php. in this location the following full source code in it and save this image to application/controllers/ Folders.
Member model loaded into the __construct() function for inserting Member data into the database.
first of all simply, add() function will load the Member adding form. When the form is submitted, profile_img would be uploaded and memebrs data would be inserted into the database using a Member model.
load->model('Member');
    }

    function add(){
        if($this->input->post('membersubmit')){

            //Check whether Member upload profile_img
            if(!empty($_FILES['profile_img']['name'])){
                $config['upload_path'] = 'uploads/images/';
                $config['allowed_types'] = 'jpg|jpeg|png|gif';
                $config['file_name'] = $_FILES['profile_img']['name'];

                //Load upload library and initialize here configuration
                $this->load->library('upload',$config);
                $this->upload->initialize($config);

                if($this->upload->do_upload('profile_img')){
                    $uploadData = $this->upload->data();
                    $profile_img = $uploadData['file_name'];
                }else{
                    $profile_img = '';
                }
            }else{
                $profile_img = '';
            }

            //Prepare array of Member data
            $MemberData = array(
                'name' => $this->input->post('name'),
                'email' => $this->input->post('email'),
                'profile_img' => $profile_img
            );

            //Pass Member data to model
            $insertMemberData = $this->Member->insert($MemberData);

            //Storing insertion status message.
            if($insertMemberData){
                $this->session->set_flashdata('success_msg', 'Member data have been added successfully.');
            }else{
                $this->session->set_flashdata('error_msg', 'Some problems occured, please try again.');
            }
        }
        //Form for adding Member data
        $this->load->view('members/add');
    }
}
We’ve used some required Preferences in our image upload configuration. You can get all the available official Preferences from click here –#preferences
Step 3 : Model (Member.php):
Make a model called Member.php. Place the following code in it and save this image to application/models/ directory.
insert() function insert the provided data into the members table.
tableName = 'members';
        $this->primaryKey = 'id';
    }

    public function insert($data = array()){
        if(!array_key_exists("created_at",$data)){
            $data['created_at'] = date("Y-m-d H:i:s");
        }
        if(!array_key_exists("updated_at",$data)){
            $data['updated_at'] = date("Y-m-d H:i:s");
        }
        $insert = $this->db->insert($this->tableName,$data);
        if($insert){
            return $this->db->insert_id();
        }else{
            return false;
        }
    }
}
Step 4 : View (add.php):
Make a view file called add.php. location path the following all the source code in This and save this image to application/views/members/ directory.
session->flashdata('success_msg'); ?>
session->flashdata('error_msg'); ?>
Step 5 : Creating Upload Folder:
Make the uploads/images/ Folder to uploading the all the uploaded images.
Conclusion
In this article, I ahve trying to display the default example of PHP CodeIgniter image upload. I hope you have learned how to upload a file/image in CodeIgniter using upload library. If you have any type of the questions about CodeIgniter image upload, let us know by commenting bellow here.