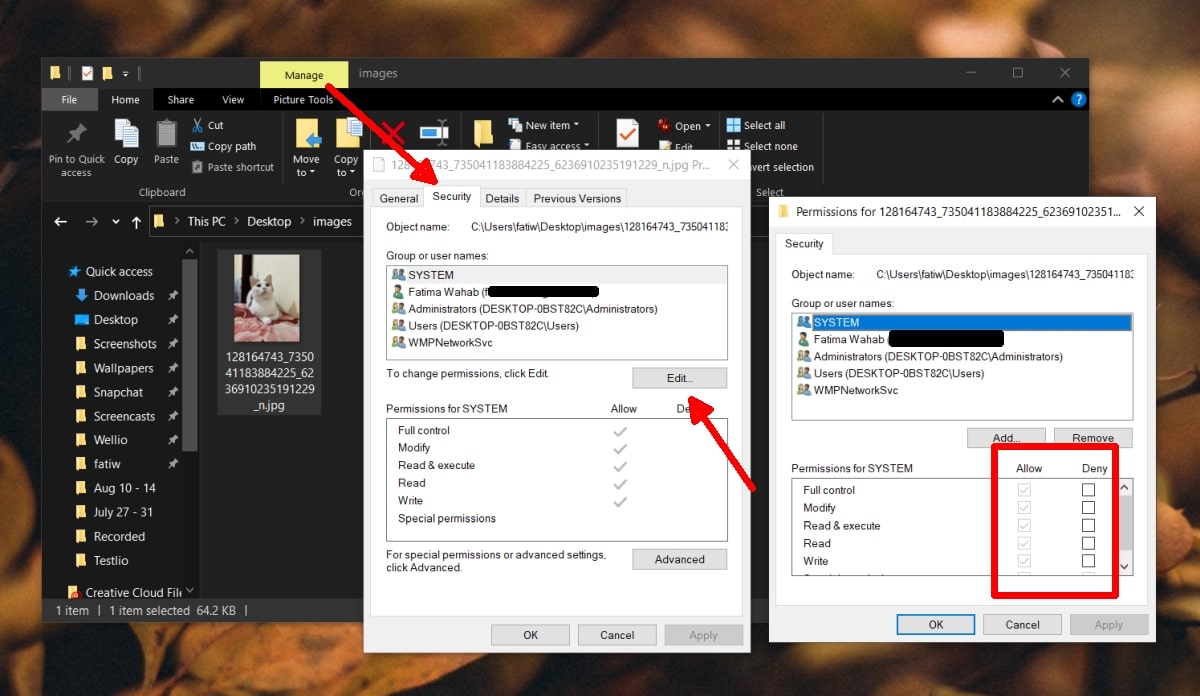
To change file permissions in Windows 10, follow these changing file permissions steps:
- Right-click on the file or folder you want to modify
- Select “Properties”
- Go to the “Security” tab
- Click on “Edit” button to change permissions
- In the “Permissions” window, select the user or group you want to modify and check or uncheck the box next to the “Allow” or “Deny” options for the permissions you want to set
- Click “OK” to apply the changes.
Note: The steps may vary slightly depending on the version of Windows you’re running and the type of file or folder you’re working with.
Are File Permissions and File Attributes Different?
Yes, file permissions and file attributes are different in Windows operating system.
File permissions determine who can access a file or folder and what actions they can perform on it (such as read, write, or execute). File permissions can be set for individual users or groups of users.
File attributes, on the other hand, are flags that provide additional information about a file or folder, such as whether it’s hidden, read-only, or a system file. File attributes can be viewed and modified using the “Attributes” section of a file or folder’s properties.
In short, file permissions control access to a file, while file attributes provide information about the file.
How to remove ‘permissions’ from Windows 10?
It’s not possible to completely remove “permissions” from Windows 10, as they are an integral part of the operating system’s security system. Permissions control who can access and modify files, folders, and other resources on your computer, and are necessary to ensure that your data is protected.
However, you can change the permissions on a specific file or folder to allow or restrict access by different users or groups.